#Knees4Skis: 8 Essential Exercises to Help reduce Knee Injury
Ski fitness is an important factor in progressing your skiing, preparing your body for the slopes, and helping to reduce your risk of injury.
You should start your preseason fitness program 6 to 8 weeks prior to hitting the slopes and continue it regularly throughout the season.
Warm-up your body with 5 to 10 minutes of cardio (e.g. stationary bike or spin, jog, elliptical trainer, brisk walking, jumping jacks, etc.)
— Learn about a simple On-Hill WarmUp here —
The following recommended exercises focus on strengthening the muscles of the core, hips, gluteals, knees, hamstrings and quadriceps.
There is also a focus on eccentric muscle contractions, due to the demands of skiing.
Complete the following exercises at least 3 times a week:
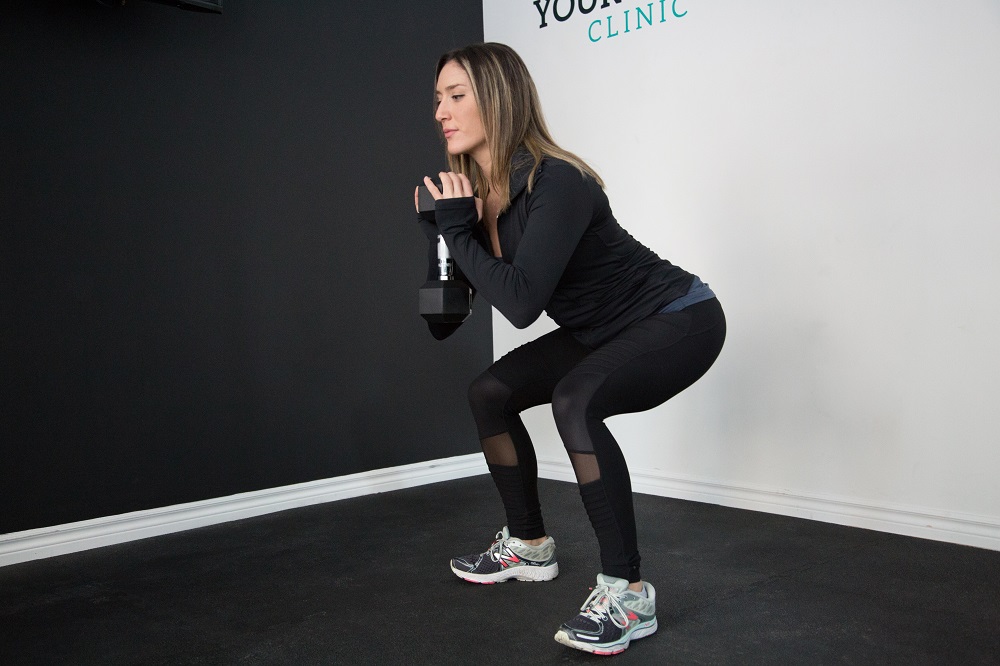
Double-leg Squats
Squats help strengthen several muscles in the lower body including the gluteals, quadriceps, hamstrings and hip abductors.
Keep your feet hip width apart. Start the squat from your hips. Keep your knees in line with your toes and your back straight. Squat as if you were sitting down onto a chair. Start with one set of 10 repetitions, holding each squat for 5 secs and increase the number of repetitions up to 30 with 15 sec holds.
Progression: a) Use a resistance band around your thighs, just above your knees; b) Perform jumping squats by taking off and landing in place (remember to land softly).
Single-leg Squat
This modification of the squat will help strengthen the quadriceps and gluteal muscles, as well as improve lower limb control and balance.
Keep your knees aligned over your toes. Stand with one leg off the ground and held out slightly in front of your torso. Cross your arms in front of your chest and do not lean forward. Lower into a squat position on your stance leg so that your knee is at about 60 degrees of knee flexion (as shown in figure). Avoid rotation and tilt of the hips. Slowly return to the start position. Complete 5 on each leg, and then repeat as many times as possible with good control.
Research studies have shown that being able to perform 22 or more single-leg squats correctly (i.e. with good form) may help reduce your risk of knee injury.1

Progression: a) Once you can perform 25-30 on each leg with good control, increase the depth of the squats to 70 degrees, and then later to 80 degrees of knee flexion; b) Perform squats while holding a dumbbell in each hand, or a medicine ball in front of your chest; c) Stand on a Bosu ball or another uneven surface (e.g. sofa cushion, pillow) to add more difficulty for balance and core control; d) Perform a faster drop down into the squat followed by a slow return to the start position.
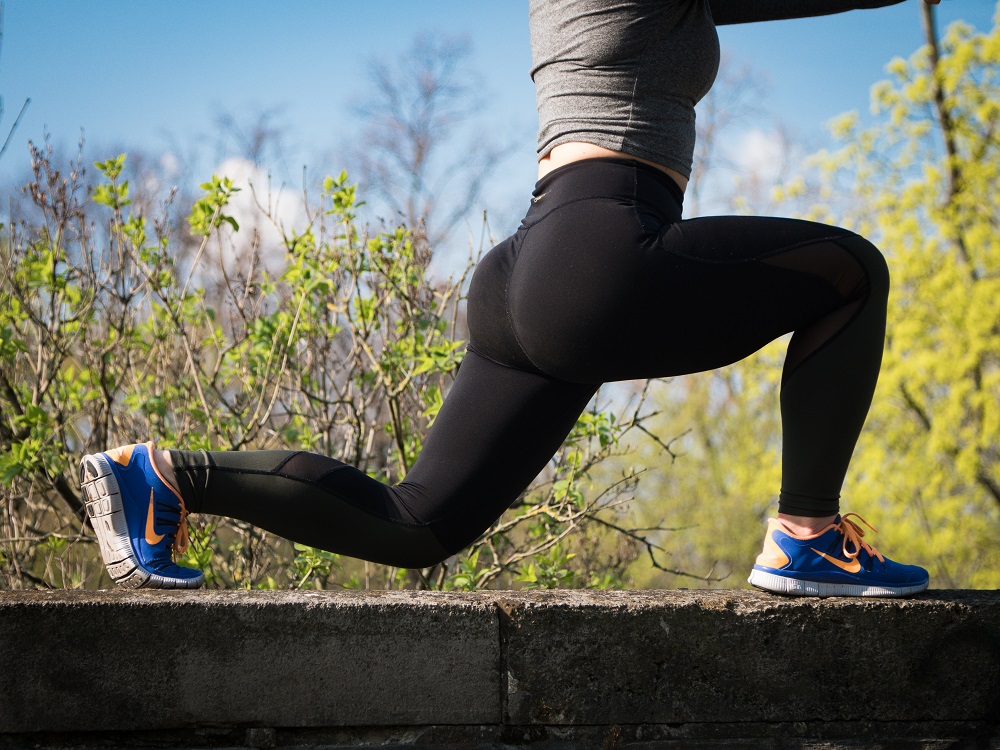
Lunges
Lunges are a straightforward way to help strengthen your lower body. When practiced from different angles, lunges are a functional movement that help strengthen your body in ways that benefit everyday movement.
Start by standing up tall. Step forward with one foot until your leg reaches a 70-90 degree angle. Your back knee should remain parallel to the ground and your front knee should not go past your toes. Start with one set of 5 for each leg and repeat as many as you can with good control
Progression: a) Once you can perform 20-30 on each leg with good control, increase the depth of the lunge to 80 degrees, and then later to 90 degrees of knee flexion; b) Perform lunges while holding a dumbbell in each hand; c) Lunge forward onto a Bosu ball or another uneven surface (e.g. sofa cushion, pillow) to add more difficulty for balance and core control; d) Perform a faster drop down into the lunge followed by a slow return to the start position; e) Try jumping lunges with controlled landing, alternating legs.
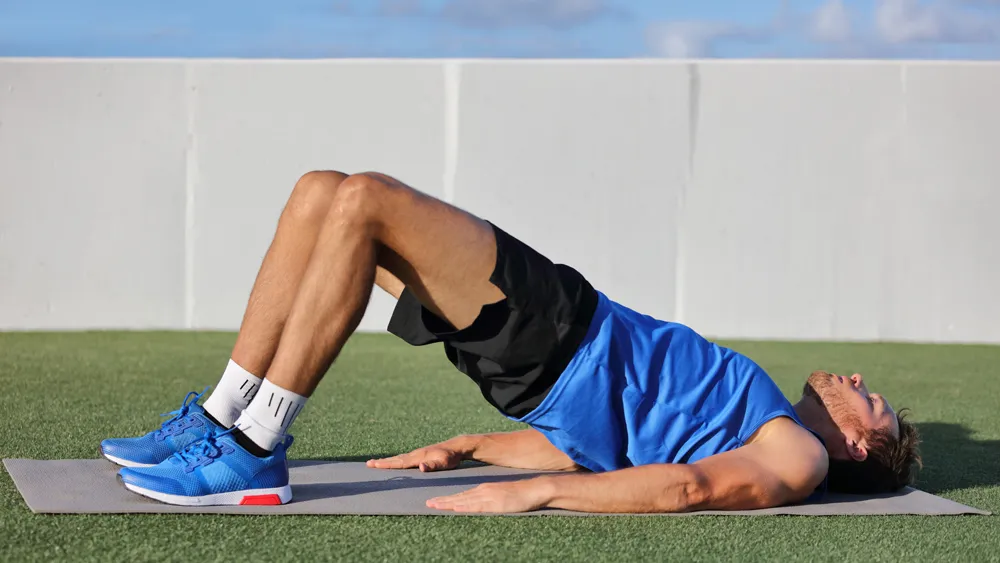
Gluteal Bridges
Not only do gluteal bridges strengthen the glutes, but they also work the core, hips, hamstrings and quadricep muscles.
Lie on your back with your knees bent and your arms by your sides. Squeeze your buttocks and lift up to create a bridge. Keep equal weight on each leg and straight alignment from your shoulders to your knees. Be careful not to push down on your neck or shoulders – use your buttocks to do the work!
 Coach Mag – www.coachmag.co.uk
Start with one set of 10, holding each lift for 5 secs. Increase the number of repetitions as your strength increases.
Progression: a) Once you can perform 20 repetitions holding for 10 sec each, change to single leg bridges; b) Add an unstable surface such as a ball or cushion under your feet to challenge your balance and core; c) Use an unstable surface while balancing on a single leg; d) When using a ball as an unstable surface and when in the contracted position, with weight through both legs, roll the ball towards you and then back before lowering to the ground.
Crab or Monster Walk
The Crab or Monster walk are excellent ways to strengthen the gluteal and hip abductor muscles. When choosing a resistance band for these exercises, select one with enough tension that you feel fatigued after 8-10 steps.
For the Crab Walk, place the resistance band directly above the knees. Open the legs slightly wider than hip width apart and turn the feet slightly outwards. Stretch the band by rotating the thighs outwards and keep the knees in line with your feet. Keeping the knees rotated outwards and tension on the band, lower yourself into a slight squat position; sticking your bottom out behind you as if you were about to sit down. Take a half step sideways against the resistance of the band. Make sure the other leg stays still, pushing out against the band. Complete 5 sets with 8 steps each.
For the Monster walk, place the resistance band around your legs between your knees and ankles (higher up the legs will be easier). Step out wide so that your feet are between hip-width and shoulder-width apart. Step forward and out to the side with one foot, then step forward and out to the opposite side with your other foot. You want to take “monster” big steps, keeping your feet as wide apart as you can while moving forward. Then walk backwards in the same manner. Try not to rotate your hips while walking.
Progression: incorporate a squat as part of the walk. Complete 5 sets with 8 steps each.
Jump Down
Incorporating “jump downs” into your exercise program will help to improve your landing skills, and strengthen your core, hips and quadriceps.
Start with a step height of 6 inches and increase the height of your jumps as you progress. Start by standing on the step and gently jump down to land in front of the step. Remember to keep your hips straight and knees in line. Start with one set of 8-10 landing with equal weight on each leg. Build up to 20-24 well-controlled landings.
Progression: a) Increase the height of the step as your strength and control increases; b) One-leg jump downs starting with a 6 inch step height, using one foot to take off and land; c) two-legged jump down, but then immediately jump up after landing to improve your dynamic strength and agility.
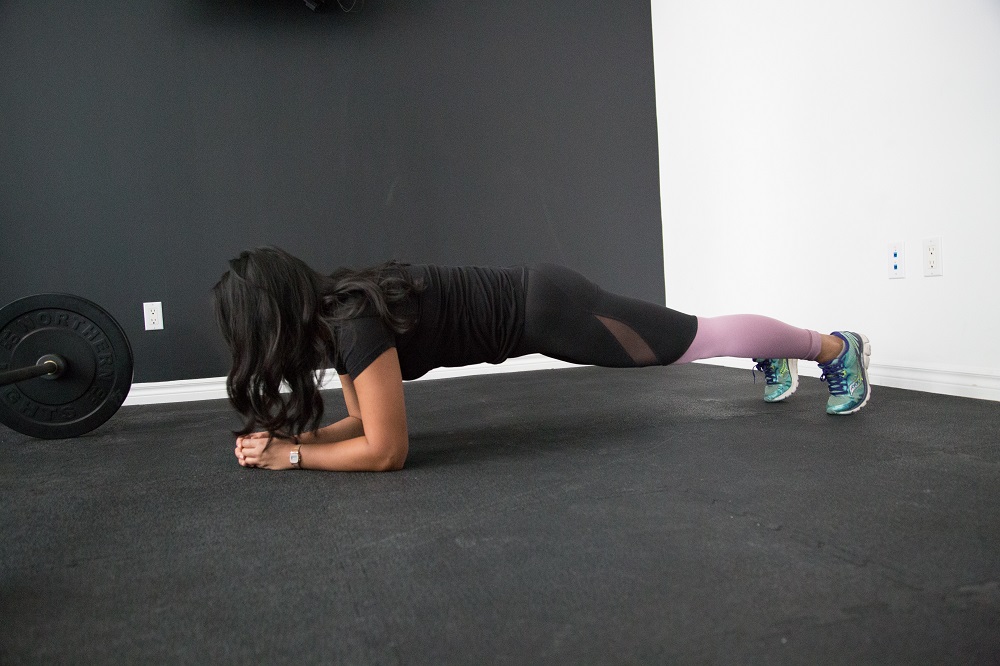
Plank
When done correctly, the plank is a great way to strengthen your core and back.
Perform a basic plank by placing your elbows on the ground directly underneath your shoulders with your feet hip-width apart. Keeping knees off the floor, lengthen your spine and tighten your abs, contract your gluteals and keep your body straight from head to heels (option to keep knees on the floor as a beginner or place your hands on an elevated surface).
Make sure your legs and hips stay parallel to the ceiling. Tuck your hip bones forward toward your belly button to increase your abdominal and gluteal muscle engagement. Make sure your back is flat and your head and neck are in a neutral position. Drive your forearms into the floor. Hold for 10 to 20 seconds. Slowly increase your hold up to 1 minute as your strength increases.
Progression: a) Once you can hold your plank up to 1 minute, perform a straight arm plank by placing your hands on the ground directly underneath your shoulders with your feet hip-width apart. Press through your shoulders and micro-bend your elbows; b) perform either a forearm or straight arm plank but raise one arm and/or the opposite leg.
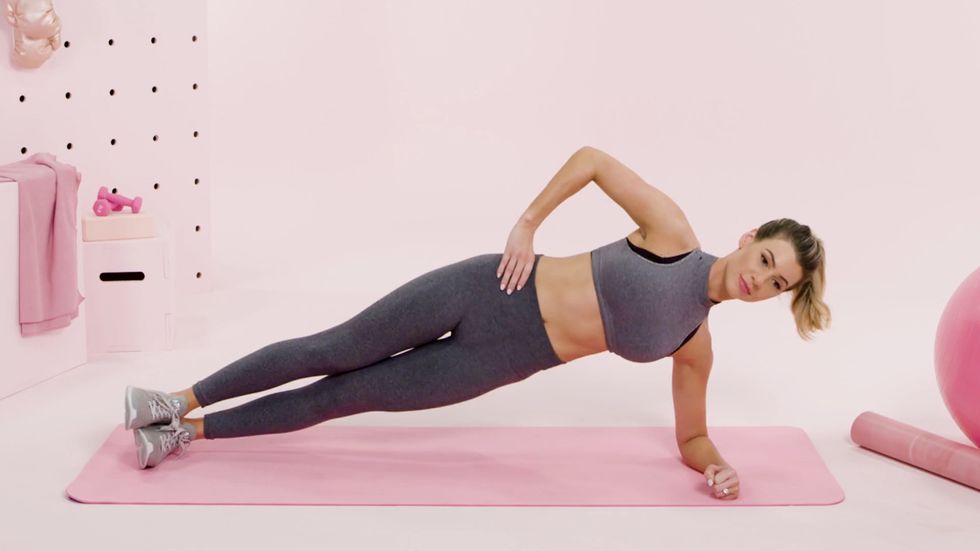
Side Plank
Face your entire body to one side with your legs stacked on top of one another. Prop your body up on the hand or elbow while keeping your feet stacked. Raise your top arm to the ceiling and engage your hips to work your obliques. Option to drop to your bottom knee for more stability or place your bottom elbow (bent) on an elevated surface.
Your optimal form looks like a straight line drawn from your feet to the top of your head, with your knees, hip, and shoulder all parallel! Hold for 10 to 20 seconds and then switch sides. Slowly increase your hold up to 1 minute as your strength increases.
Progression: Once you can hold your plank up to 1 minute, raise and lower the top leg.
— Incorporate these extra essential exercises into your routine to avoid knee injury this season! —
DOWNLOAD THE #KNEES4SKIS BROCHURE
Disclaimer: These exercises are meant as a guide only. Please consult with your Physician or Physiotherapist prior to engaging in any exercise program or if you are experiencing pain that persists for several weeks.
Expert Contributors

Dr. Mark Heard, Orthopaedic Surgeon, Banff Sport Medicine Clinic

Lynne Richardson, Physiotherapist, Rocky Mountain Rehab & Sports Medicine Clinic